Don't let it ever be said that I don't
share the less than stellar performing projects. After a couple of
months on this water cooler - building, then disassembling, then building
again, I have shelved it and moved on to WC8. It's not that it didn't
work, it's just that it didn't meet my expectations. However, it
did bring a few problems to light that I had not had to deal with in previous
coolers.
If nothing else, I did document the procedure
with some of the details missing from previous cooler articles.
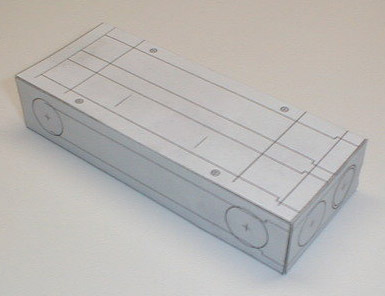
As usual, my design
starts out with a scale drawing taped to the aluminum stock to allow me
to work out any obvious errors in design.
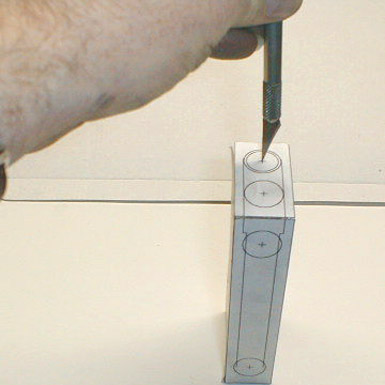
Getting a drill bit
not to "walk" away from the intended starting point is difficult.
I lessen the problem by twisting an X-acto knife to get a reference point
which gives me a place to start the drill bit.
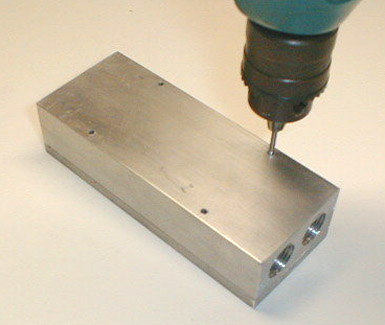
I then use a small twist
drill in a miniature chuck to get the hole started. While this is
a bit time consuming, my holes are rarely off by more than a few thousandths.
This is closer than I can get with the drill press alone.
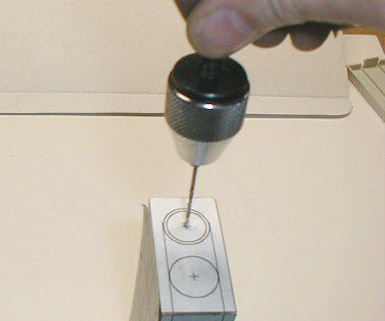
Drill the holes with
ever-increasing sizes of bits until the correct diameter is reached.
The second to last cut is just a fraction under the desired diameter so
the last cut doesn't have to dig through too much stock. This makes
for a cleaner hole. Each hole was then tapped to 3/8" NPT.
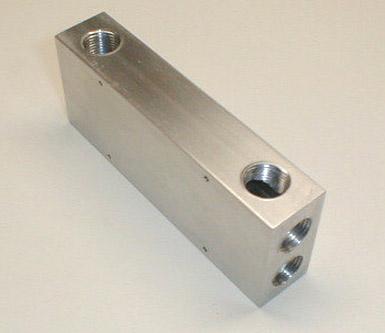
With the pilot holes
already done on the drill press, I ream out the cold plate mounting holes
to their final diameter. This step also cuts the holes in the cold
plate which is taped to the bottom of the block. This insures that
the plate and block will line up exactly. When your tools aren't
perfect, a trick or two helps to get a good fit.