
|

While I wasn't building a hotrod, I still wanted the setup to be as powerful as I could get without spending an arm and a leg. Finances dictated that I "settle" for the following:
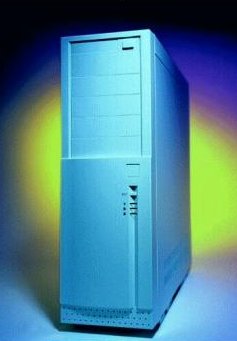
In-Win Q500N
This is a full tower case with a 300 watt
Powerman power supply. At $90 to $95, it's a nice case for the money.
Having had a few of the earlier versions of the In-Wins, the only complaint
I've been able to come up with is that the front power button is prone
to sticking. It's more of an annoyance that anything else and a bit
of graphite powder does help the situation, but one would think that In-Win
would have taken care of this situation over the past few years.
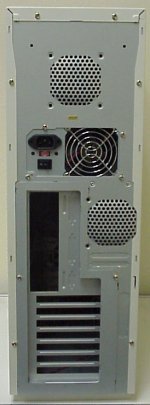
The only new feature I see since my last Q500A is the change of the mounting
points for two rear 3 inch fans. Where the Q500A had both fans mounted
above the power supply, the Q500N mounts one above and one below the P/S.
Fans are not supplied with this case.
Asus P3V4X Motherboard.
Believe it or not, this is the first board
I have bought without an Intel chipset. I gave this board a lot of
thought before I decided on it. I wanted the features of a newer
board, but wasn't too excited by the price of an 815 chipset board.
Paying the extra dollars for sound that I wouldn't be using and video
that didn't equal the Matrox G200 I had sitting idle since buying an Asus
7700 for my main Windows box seemed a waste. I have a few more processors
than motherboards at the moment and some of those are slot 1. As
I wanted to be able to use what I had to keep the cost of this box down,
I went for the P3V4X rather than the CUV4X.
I am happy to say that the setup of this board was in keeping with Asus's reputation for first quality products and went as smoothly as an installation can. (Everything was right accept the assembler.) From unpacking the boxes to being up and running DOS commands, including modifications to the cooling of the box only took about three hours. This should have been about a half hour less, but in my haste to get it going, I plugged the CD-ROM cable in backwards and had to diagnose why the hard drive and CD weren't being recognized. Yes, having the plug on the CD wrong stopped the hard disk from being recognized in the BIOS. Darn I hate those cables without the blank area in the center of the plug. A beginners mistake and I made it.
As for going with the VIA Apollo Pro133A chipset over the Intel 815, I'm impressed with the VIA. Swapping processors from an Abit BF6 to the Asus, the "seat of the pants" feel of the board is comparable. Benchmarks are a hair slower, but being able to run the RAM at 133 with the processor at 100 MHz evens out the playing field against the BX chipset Abit running 100/100. I have no complaints with the board at this point and at $110 for the P3V4X, and the CUSL-2 going for $160 from my local source, the difference paid for a TEAC floppy and a NEC 52X CD-ROM. Such a deal!
For a hard drive, I ended up with a WD 205BA Caviar. Not the fastest of the current crop of drives, but it handles overclocking well and is by no means slow. I have another of these and this one will eventually join its brother in a raid 0 setup. Call it $120 for 20 gigs of space.
Since memory is something that NT loves, I figured that the minimum it would be happy with was 128 megs. A trip to Mushkin's site and 2 days later (like clockwork) there was a stick of CAS-2 133 RAM on my doorstep. RAM prices are up a bit at the moment and this set me back $140, but I have used this RAM in a few boxes of my own and a few for friends and have always been happy with their product. I'd still rather pay a bit more for a product from a company I trust than take a chance on an unknown.
Filling out the minimal hardware requirements for this box, were a processor - 300 Cele, 366 Cele, 550 Cele, 700 PIII, (take your pick) my "getting old, but tried and true" Matrox G200, and a newly purchased Linksys LNE100TX network card which set me back a whopping $15.
With the basic box accounted for, I needed a monitor, mouse and a keyboard. Since I am running a bit short on desk space, I decided to go with a KVM (keyboard, video, mouse) switch so I could share those items with the Linux box. After some research, I decided on another Linksys product - model number PSKVMSK - which comes as a kit with all the cables necessary to make it work. Listing for around $109, but available from Buy.Com and others for under $70 and having better video specs than the Belkin Omnicube costing over twice that amount, this was another pretty sweet deal. It works like a charm, though if you have never used a KVM, it takes a day or so to get used to switching back and forth between operating systems.... More times than I care to talk about I've scratched my head and wondered why a Linux command wasn't working in NT and vice-versa. Why doesn't cd /home/benchtest work on NT anyway? ;-)
The bottom line is that with the processor and vid card in my possession, I put together a respectable system for about $580 including shipping. However, me being me, I took the money "saved" and upgraded my (now too small) 4 port hub to an 8 port switch. Oh well, at least there are fewer packet collisions on the network now.
So where is this leading? Is there going to be any cooling stuff in this article? Some.
As this system was not meant to be a hotrod,
just a mildly overclocked work box, I felt that air cooled was the way
to go. It would also give me the opportunity of trying out a few
new cooling components I had accumulated. As for choices of heat
sinks, heaven knows that I have enough around to play with, but first things
first. Time to set up the case.
 |
 |
 |
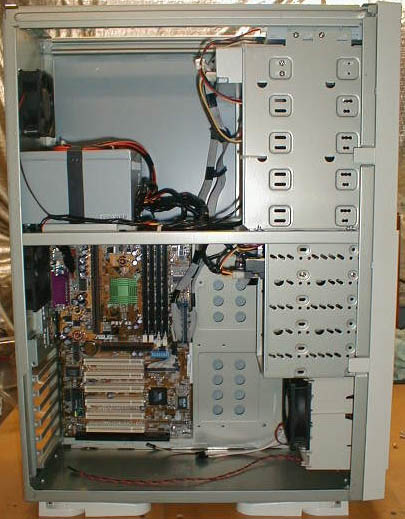
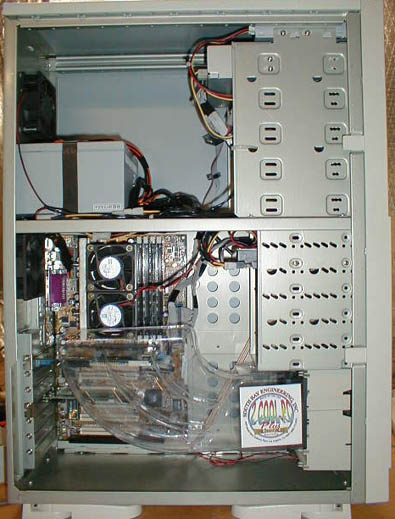
The first step was to get the box to breathe
well. With the two fan mounts on the box and the one in front empty
I rummaged through the fan box for some likely candidates. I found
a matched pair of Sunon 75 mm ball bearing units for the rear of the case
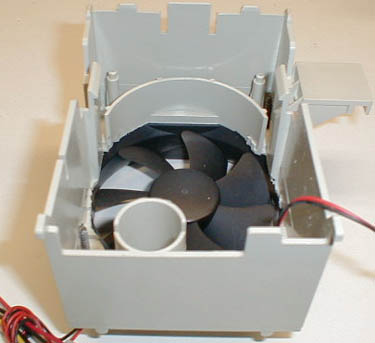
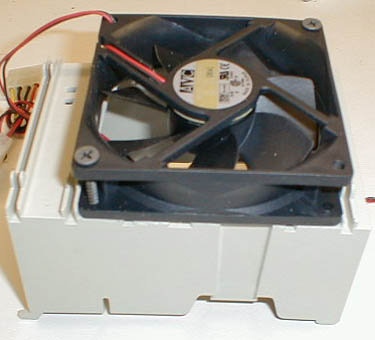
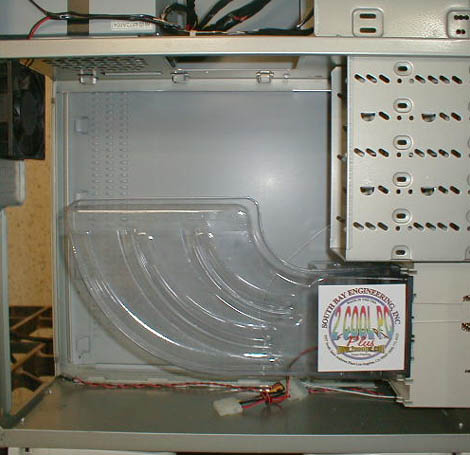
and a 92 mm AVC ball bearing unit with duct from 2
Cool PC. I have been looking to try this fan and duct combination
out for a while, but hadn't found a case that it actually fit in the way
that I wanted to mount it. Their website shows the fan and
duct sitting on the floor of the case. However, I thought that it
might be more effective if it was mounted in a way that would allow the
fan to pull air directly from outside the case, rather than recirculating
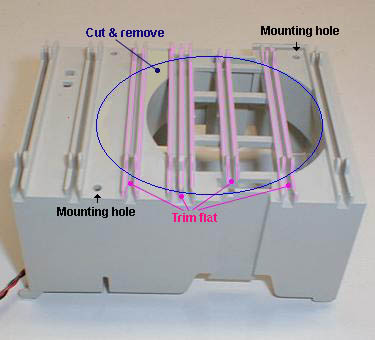
the air from inside the case. To do this, I needed the fan
to be mounted farther inside the case than the stock In-Win setup allowed.
I would need to modify the fan holder to take the fan on the outside.
After measuring and drilling the mounting holes, I was able to determine
where I would have to make the cuts to allow the fan to sit flush against
the holder.
 |
Dremel tools are the tinkerers best friend.
While I wouldn't try removing rust from lawn furniture with one, as I recall
seeing in a recent television commercial, (got a month or two to do it?)
I will use it for darn near anything else. Plastic cutting is no
exception. There's something about the smell of melting plastic that
means a project is under way.
 |
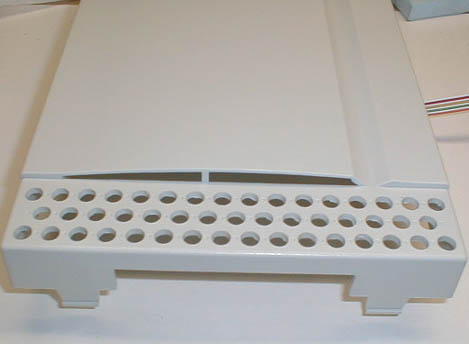
With the front fan mounted, it was time
to turn my attention to the front panel of the case. The air holes
on the case are a bit on the small side for my taste, so with my drill
in hand I opened them up a bit. 9/32" (about 7 mm) is where they ended
up.
 |
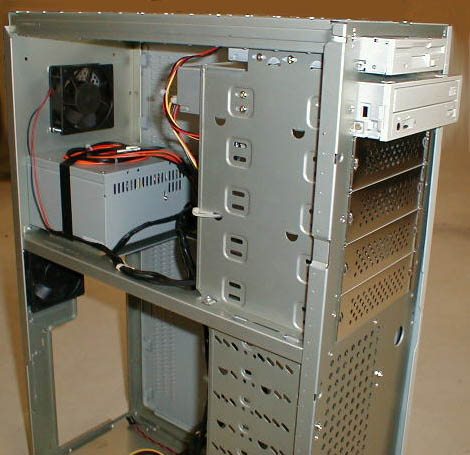
The pair of Sunons get mounted to the rear
of the box blowing toward the outside. Including the somewhat anemic
power supply fan, that makes 3 blowing out and one as an intake.
As close as I can figure it, that leaves me with a bit of negative pressure
in the case. I would prefer a small amount of positive pressure so
that with a filter on the intake fan, I am not drawing dusty air from any
of the holes and cracks in the case. As I get the time, I will experiment
with different configurations. Possibly flipping the lower Sunon
over and using it as a filtered intake. However, for the time being,
I need this box up and working. Tweaking will come as I get the time.
 |
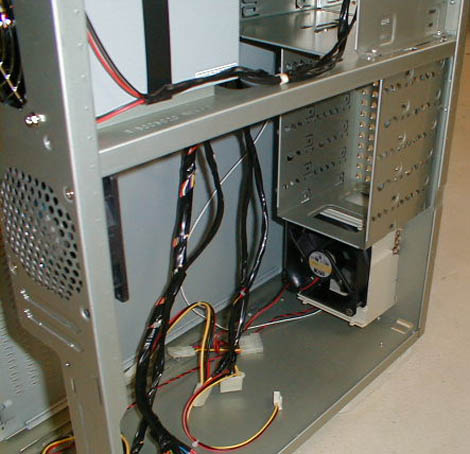
Seeing as I was out of cable wrap - you
know the stuff, the spiral plastic that is used to keep bundled wires tidy
- I wrapped the wiring "automotive style" with electrical tape. The
goal was to make for the best possible air flow.
 |
2 Cool PC has had these fan and duct combos
out for a while. The goal being to get some cooler air to where it
is needed most. It is a great idea that, unfortunately, is hard to
implement. The difficulty is that there are just too many different
cases to have a "one size fits all" duct. On their installation
page, the duct is shown sitting on the floor of the case and directing
air between the AGP and first PCI slot. This could be a good thing
if you happened to have a hot video card, but getting the air to the processor
made more sense in this installation. By mounting the fan a couple
of inches up from the floor, the duct brings air closer to the processor.
 |
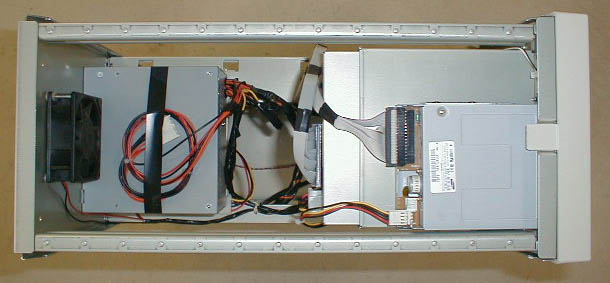 |
Until the time comes when motherboard manufacturers standardize the placement of the power connections, switch connections, and drive connectors - and case manufacturers pre-route their wiring, we as system builders will have to deal with the myriad of wires and where best to hide them. Nothing screws up a clean box more than wires and cables running helter-skelter through it.
Doing a test fit of the wire routing, wrapping
the power wires, and splitting and bundling the IDE or SCSI cables can
make a world of difference in not only the look of the box, but in providing
a clean path for the air to flow in the box. Not having cable wrap
doesn't have to stop you from accomplishing this. Electrical tape
works just fine.
 |
 |
Mounting the duct was just a matter of
snapping it in place. Mounting it up from the bottom of the case
helped direct more air to the area of the CPU, but not enough to make a
substantial difference in the processor temperature. After enlarging
the duct's exit hole, I was able to direct more air to the approximate
area I wanted. This resulted in a slightly lower temperature for
both the vid card and processor. In a case that breathes well to
begin with, there is a limited advantage to this duct. However, if
you run your vid card on the ragged edge of stability, the duct could provide
the additional air flow necessary to keep it cool.
 |
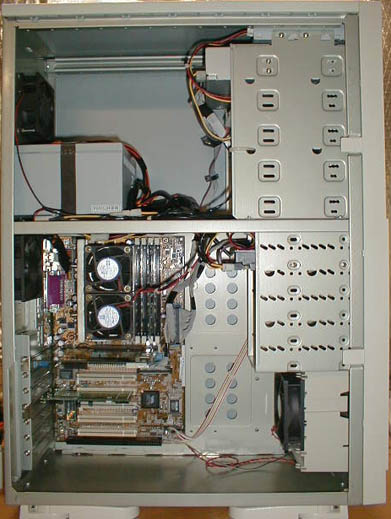
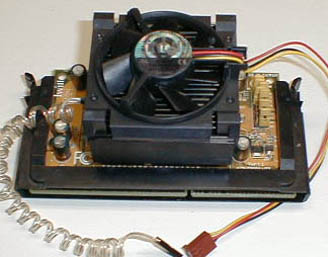
After a few weeks of running with the 550 Celeron, it became evident that the processor just didn't have the horsepower needed to deal with all of the programs that were running at once. Time to yank the PIII - 700 from the Linux box and swap processors.
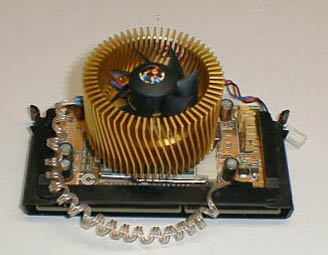
After some testing, I had chosen to run the PIII in the Linux box with the stock heat sink and fan. Decent performance and quiet. This is not to say that the setup was completely stock. I had added an aluminum shim to surround the wafer and a copper shim to act as a "heat spreader" between the heat sink and chip. I was pleased with the performance, but had not taken the time to do any formal testing. I had also acquired a Golden Orb that I wanted compare with the stock PIII sink. Now that the PIII was moving to the NT box, I could afford to test in an environment where shutting down the box did not take the network off-line. My family appreciated this.
The test consisted of the stock PIII - 700 heat sink, a Thermatake FC0370 Golden Orb, a home made aluminum shim to surround the processor and give a flat surface to mount the sink to, and a copper spacer to act as a heat spreader. The aluminum shim was lapped to as close to the processor height as possible. When the copper shim was used, it was placed on top of the aluminum shim. With the exception of the first test, the aluminum shim was always used to ensure flat contact between the processor and sink.
To get the processor up to temperature,
I found a program named CPU
Stability Test. It is supposed to run the processor at 100% usage.
It seems to do exactly that as you can see from this screenshot.
 |
 |
|
|
|
 |
 |
When I began this project, I wasn't looking
to build a killer system - just something with above average performance
that would allow me to focus on the software I'm trying to master.
What I've ended up with is a very repectable box. I'm much more pleased
with the P3V4X board than I thought I'd be. Aside from getting the
CD cable in backwards, I've had no setup issues at all. The 4 in
one drivers installed and performed without a hitch and the stability of
the system has been superb. My only "issue" was in order to load
the large Primus database I'm using into MS SQL required more memory than
the 128 megs I am running. I "borrowed" another 128 meg stick of
Mushkin PC133 from another box for the install and didn't want to return
it. 256 megs for NT Server seems to be a good number for my present uses.
It looks like another call to Mushkin is in my future.