
|
I had been rethinking my cold plate and had decided to take a tip from the companies who do this professionally and try to scale the width and length of the plate to more closely match the size of the item I was trying to cool - the slug. I was also getting tired of trying to align the cold plate, TEC, and hot plate into a sandwich. While assembling the sink with its many layers, it was becoming increasingly difficult to keep the TEC centered directly over the slug. I thought it might be nice to assemble the 2 plates and the TEC into one screwed-together component.

This arrangement would not only allow for easy alignment on top of the slug, but would also allow easier to insulate, if that became necessary. It would also make it easier to transfer the TEC assembly from one heat sink to another.
The performance of the 40mm TEC with the copper hot and cold plates improved a bit more over the use of the single aluminum cold plate.
There was not a tremendous difference in performance in the
boot up test. A degree or so cooler on both the diode and heat sink,
with the room temperature up another degree higher.
 |
Condensation
I've made steady progress. Perhaps
not as much as I would have liked, but progress just the same. I
was in the process of checking for condensation and found it for the first
time. I had been expecting it, but not to the extent that I saw.
I had placed a piece of plastic sheet on the up-facing side of the AGP
card with a couple of paper towels to catch any stray drops - just in case.
What I found was a drenched paper towel. That was enough playing
for one night. I shut down and removed the paper towels and let the
case air out overnight.
Insulation
With my trusty egg cartons and meat trays,
I set about assembling a prototype. The large copper face of the
cold plate would have to be milled down so that only an area a little larger
than the slug protruded through the insulation. I made a makeshift
milling machine out of my new drill press and a "XY" table. (This
is a vise that allows incremental movement along the width and length of
the clamped object.) It is not as accurate as a mill, but is a lot
less expensive. I used 3 layers of foam; one around the TEC, one
around the cold plate, and one over the top of the cold plate. The
foam was glued together to form a moisture-tight enclosure. Once
I've had a chance to make sure this arrangement works, I'll work up a cleaner
design for the foam.
I also machined and lapped the base of the P125 flat so the hot plate would make contact with the entire base of the sink. I understand that Alpha makes a sink with a flat base, but I wasn't in the mood to wait.
I also tried reversing the direction of the 60mm heat sink fans. This may prove to be an interesting project in itself. With some ducting, the hot air from the sink could be directed to vent outside the case. This could help cool the sink by allowing the sink's intake air to be a few degrees cooler. (Maybe next week....) It didn't make much difference with the case configuration the way it is.
 .
. .
.
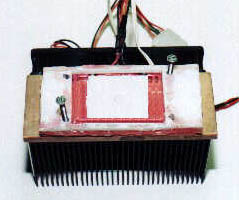
L: Two layers of foam with the TEC snug in the red foam.
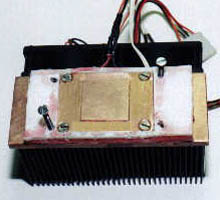
C: The cold plate is screwed into place.
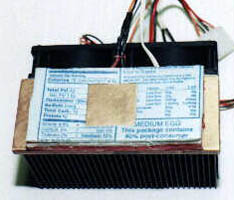
R: The top piece of foam covers the majority of the cold plate.
(Yes, it is the top of an egg carton.)
.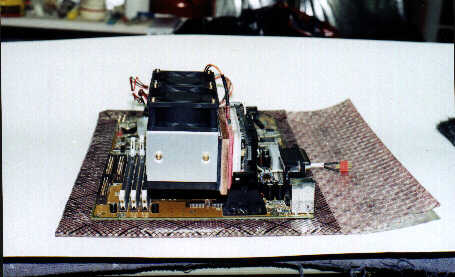
The assembled P125 and copper sandwich on a BH6. Big.
Again, the room temp is up a couple of degrees and the
slug has come down a bit. The heat sink actually dropped
a couple tenths of a degree at the end of the boot test.
Another good run.
As usual, I learned a lot from this latest attempt. I finally got a chance to deal with some condensation and I think that my solution will work. It's been a couple of days and the temperature and humidity have been fairly high in Virginia. I have not seen so much as a damp spot. I was a bit concerned about the many pins that attach the CPU to the SEPP, but so far I have seen no evidence of moisture. The idle temperature of the slug runs about 33°F - not making it below freezing, but pretty cold. The highest diode temp I have seen has been 86°F with a room temp of 82° and after a couple hours of Quake2.
That's all for now.
|
|
|
|