
|
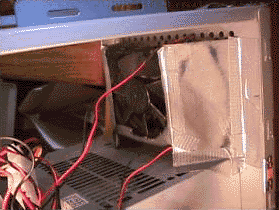
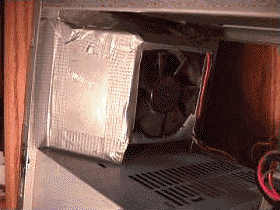

After finishing this, I decided to add another fan on the OUTSIDE of the case. This fan is mounted on the case, but its used to help suck air out of the case. It looks dangerous by having a fan mounted like this, but the fan blade is actually located on the other side of the housing. For an added effect and better cooling, you can also create another duct on this side using the same method as the fan inside; however, after placing my hand on the back to feel the air flow next to the small holes, it was just about the same as my power supply fan. This was a huge improvement compared to not having the duct.
I have also added two Radio Shack squirrel fans, plus the standard case fan located in the speaker housing.
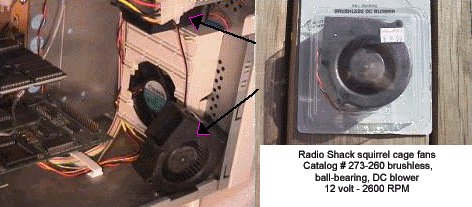
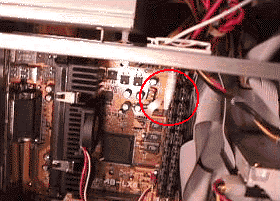
The squirrel fan at the bottom helps draw air in from the vents located at the bottom of the removable side panel. Both fans are pointed on the Voodoo2 3D card located at the top. NOTE: Do not connect the 2 fan wires to the red/black wires of the 4 prong connector as this will supply only 6 volts to the fan and make it run at 1/2 speed. You should use the yellow/black wires of the 4 prong connector for 12 volt operation (correct voltage and full speed). Also note the cabling and wires are tied back out of the way of air flow.
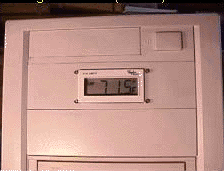
After replacing the side covers and top, here was the ambient room temperature before turning on the PC (71.5°F). The entire procedure took about one hour from start to finish.
Now the real test. After running the PC for half an hour, the temperature indicated 78°F. This dropped the temperature before the ducting from 83 to 78°F. Not bad for an easy modification. Also, you dont have to use sheet steel, as a sturdy piece of cardboard or even Plexiglas works great too.