
|

Bringing Home a
Sheldon 12" Shaper
May 31, 2015
Sometimes I am
fortunate enough to be in the right place at the right time. This
was one of those times.
A week and a
half ago a Sheldon 12" metal shaper was offered for sale on the CAMS group email list. The
current owner had purchased the shaper about six years ago from
another member of the group and now found himself working on
projects that the shaper wasn't suited for. It was time for him to
free up some space in his shop and let the shaper be enjoyed by
someone else.
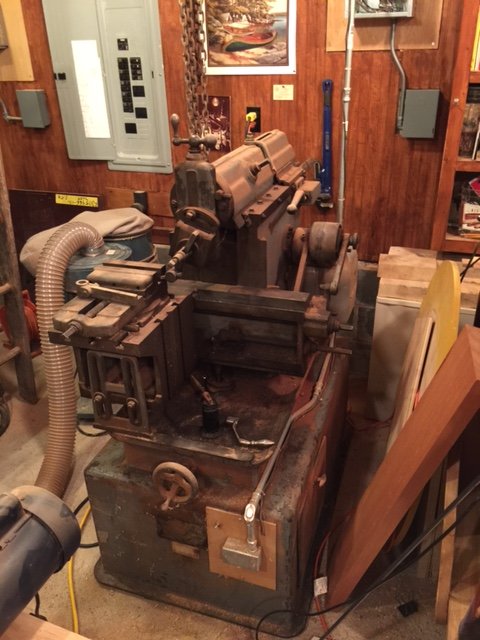 |
| This is
the picture I received when I wrote to ask about the
shaper. It is the 12" model and is a good size for my home
shop. |
I happened to be
the first one to contact him with a request for pictures. Charles
responded with some photos of the shaper and a little later with
some photos of the location it needed to be moved from. Within an
email or two, I replied that I would enjoy being the shaper's new
custodian. With the commitment made, I switched into rigging
mode. There would be lots to do before I could pick the shaper up
and bring it home.
 |
 |
| I was
sent this image of the entrance to the park. The driveway
runs along side his shop. Notice the black lines on the
driveway and street near where they meet. They're trailer
scrape marks. |
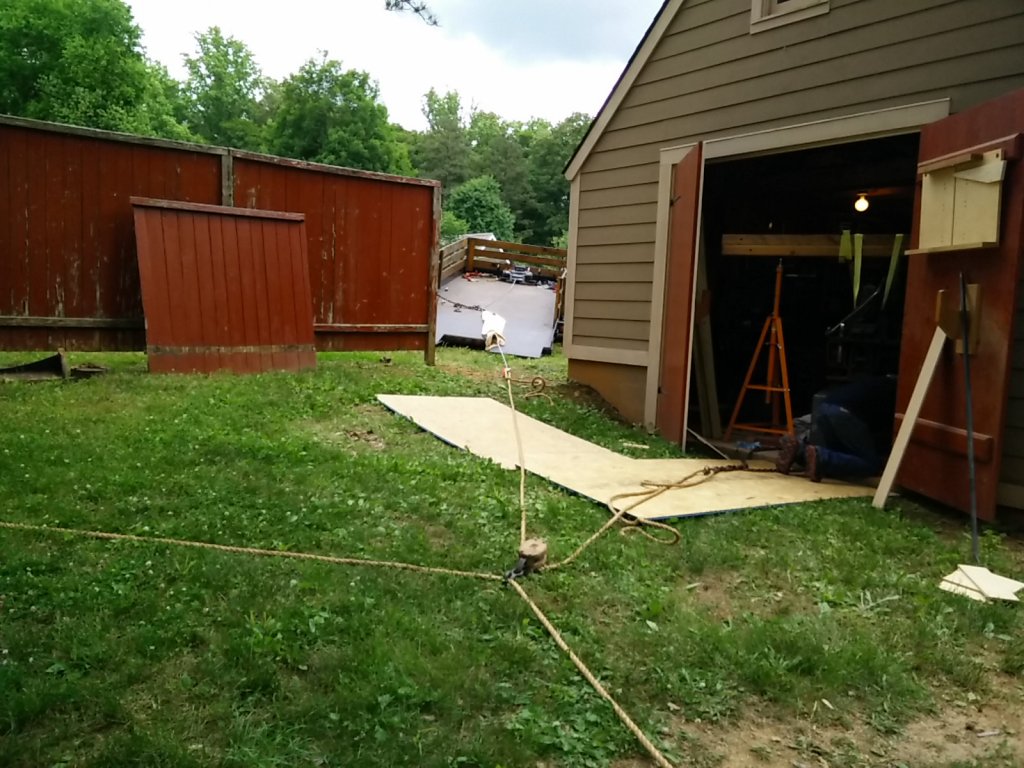
This is
a shot of his shop. The area just past the fence is where
I could park my trailer. Not a lot of room for my long
trailer, and even less if my truck was still attached to
it. |
 |
 |
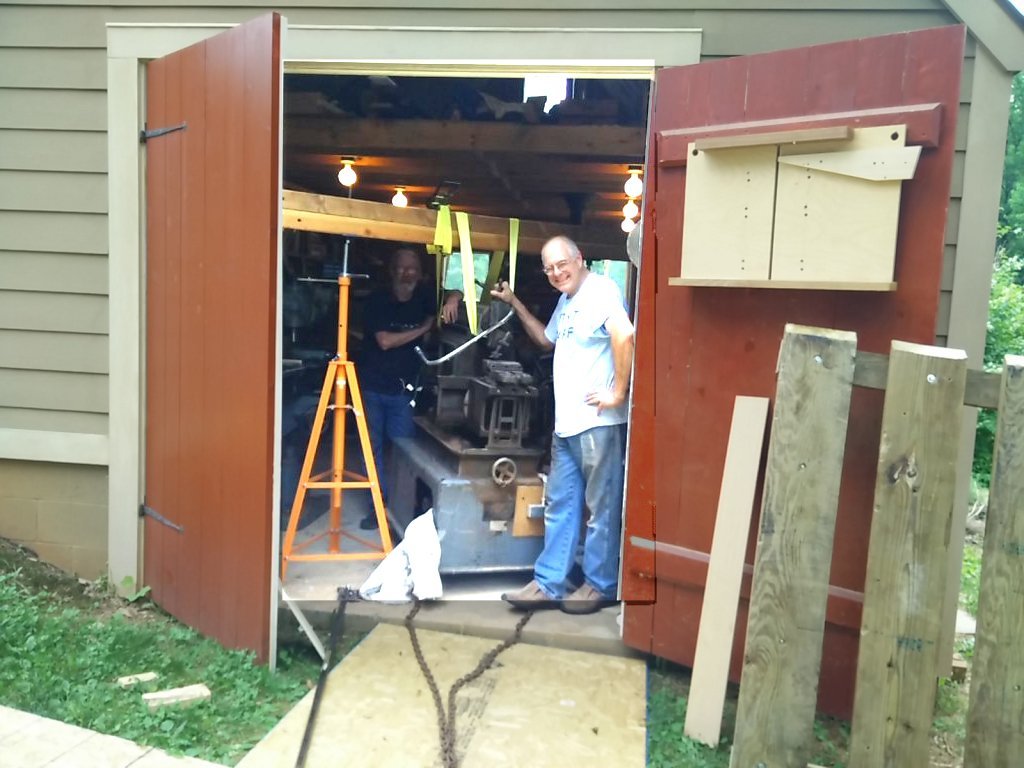
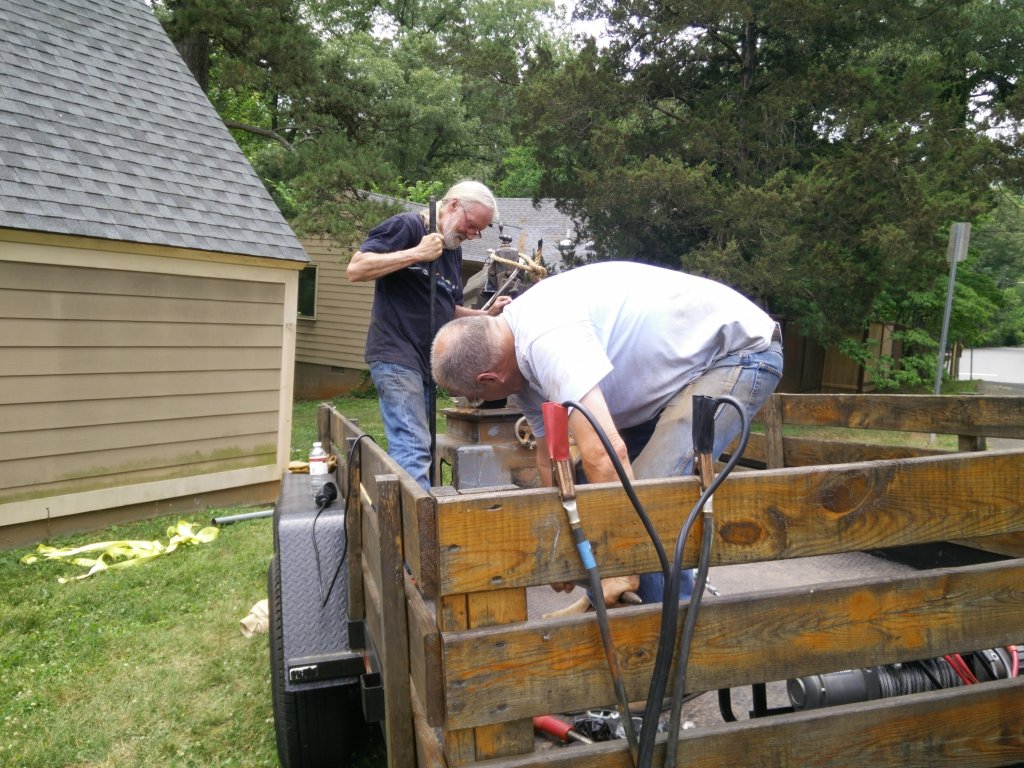
| The
shaper is in the air. Excuse the crummy job of
lightening the center of the picture to show detail. |
Not
that far of a move from the shop to the trailer, but
there were a few challenges. |
 |
 |
| The
sled is under the base and it's time to lower the shaper
back down. |
With
the help of the two small boards, we got the shaper out
far enough to turn it. |
After some more
thought, I decided that the under car stands (I call them
transmission jacks - Harbor
Freight item #60759) that I use to create a poor man's
version of a gantry crane, might be just the ticket. I've modified
the stands with a piece of all-thread extending from the top of
each stand to keep a couple 4"X4"X8' boards centered. The stands
are rated for 2000 pounds each and I figure that the two 4 by 4s
will support at least a couple thousand pounds with five feet
between the tops of the stands. The stands have the added feature
of being adjustable in height. This is accomplished with an Acme
screw jack at the top of the stand. Turning the screw jack will
increase the height by about five inches. Once the decision was
made to use the gantry, I stripped down the tops of the stands and
lubed the Acme screws, bearings and nuts to make sure that they
were as easy to turn as possible.
I built the sled
later that day. I made sure that the carriage bolts I counter-sunk
into the bottom of the sled would extend through the four holes in
the shaper base with enough room to add a couple washers and nuts.
Charles told me that the thickness of the base was about 3/4". I
also tried to make sure that the bolts were accurately positioned
to the measurements I had received from him. I packed up a drill
and some spade bits just in case I had made an error in measuring.
I also packed longer bolts and extra washers. I was going to be
two hours from home and there wouldn't be time to get more tools
or parts if I forgot something. I tried to make sure that wouldn't
happen. I packed up every tool I thought might come in handy -
just in case.
I have a winch
on my trailer that will also attach to the truck's rear tow
receiver. There are two 25' long 2/0 gauge power cables that
extend from the winch to the bolt-on connectors on one of the
batteries in the truck. I also brought along a set of jumper
cables in case I needed a few more feet of length. These helped
out when it was discovered that his Mini fit next to the trailer
better than my truck on the small piece of real estate outside the
fence. We used his Mini's battery to power the winch. I had
guessed that I had pretty close to enough cable on the winch to
get to the shop, but brought along a couple tow straps to make
sure that I had enough reach. I had my snatch block, chains, chain
binders, cinch straps and tarps in case of rain. I figured that I
was ready for the move.
 |
 |
| The
shaper is safely on the trailer. We're now in the process
of centering it for the ride home. |
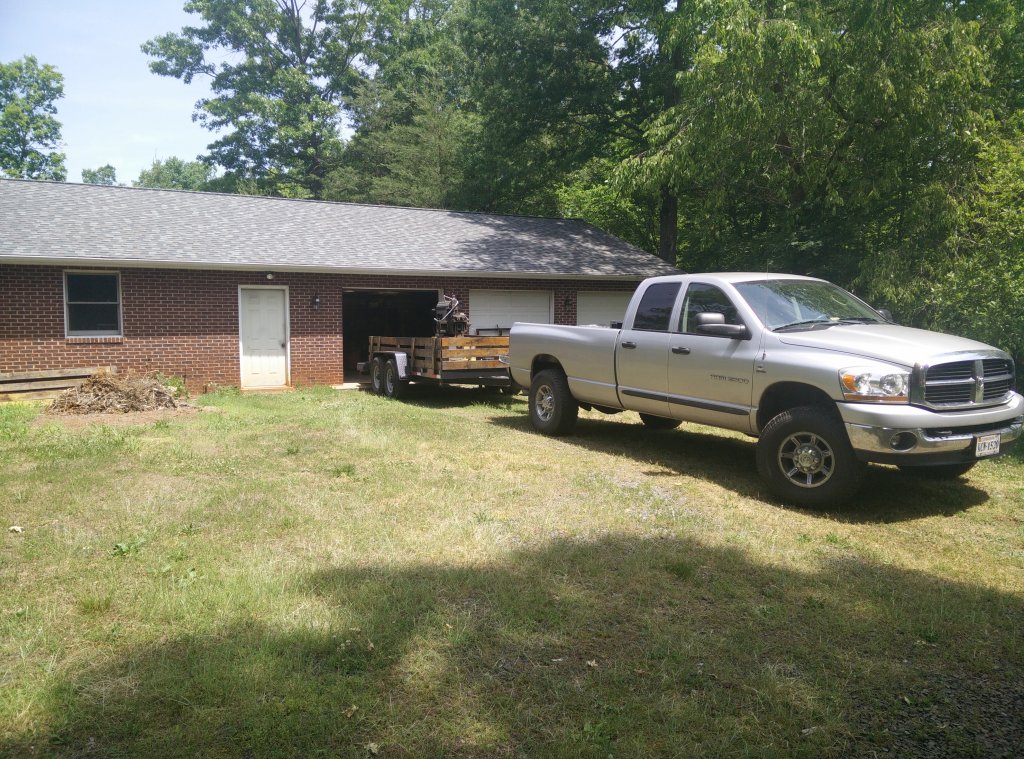
The
shaper arrives at my shop. The brush pile on the left was
in the trailer the day before. |
My wife Susie
decided that she'd like to come along and took the day off of
work. I was happy for the company and I knew that she could
operate the winch while Charles and I attended to steering the
shaper. We got to Charles' home around 10:30 AM and was impressed
to see that he was ready for us. He had removed the section of
fence and had already laid out a block and tackle to guide the
shaper out of the shop. Backing the trailer up to the fence was no
easy feat. Between the length of the truck and the trailer, there
wasn't much room to get a good angle to back the trailer in. I
decided that we'd unhook the trailer and guide it into place using
a tow strap between the truck and trailer. We got it situated, but
I think the gods of old iron were on our side. With the trailer in
place and held steady with some wheel chocks, we began unloading
the tools.
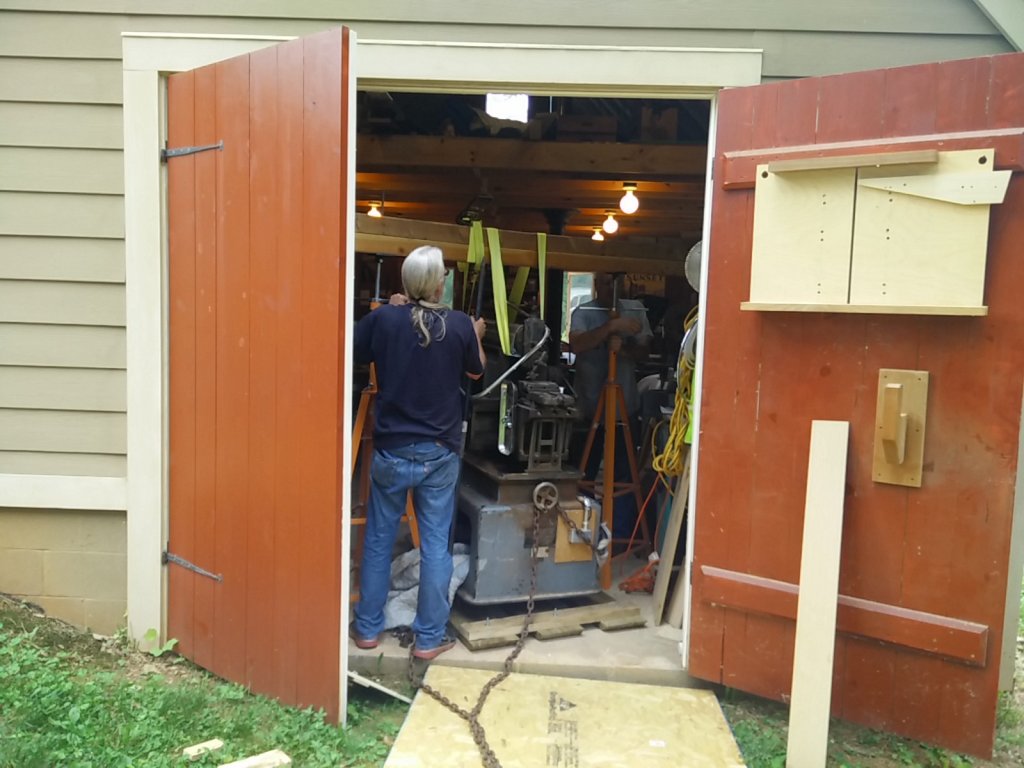
To get the move
started, we used the Johnson bar along with the winch, which was
hooked into the the block and tackle, to drag the shaper closer to
the doors. This would allow us enough room to set up the
improvised gantry. Things were a little tight as we worked next to
his good looking Van Norman #12 milling machine. I didn't want be
the cause of anything happen to this machine, or anything else, so
we took each step of the move with some thought and discussion.
Lifting the
shaper with the gantry as easier than even I expected. Turning the
Acme screws lifted the shaper easily and within a couple minutes
we had the shaper base high enough that we could slide the sled
under and secure it. Time for a photo. My wife was put in charge
of snapping photos and we got one of the two of us with the shaper
in the air. The next step was attaching the sled. It turned
out that the bolts in the sled were close enough and there was no
need to do any drilling to reposition the bolts and soon we had
the shaper on the sled with some pipe rollers under it.
 |
 |
| The
chain binders have been removed and I'm about ready to
off-load. |
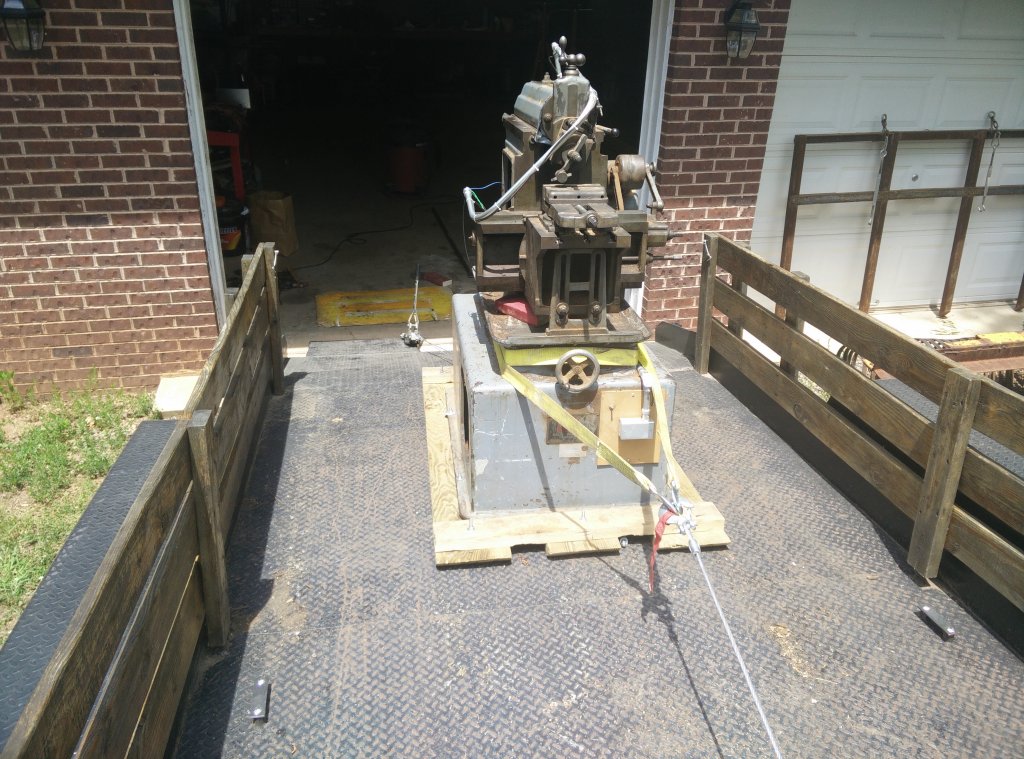
Using a
snatch block at the end of the trailer, I could pull the
shaper far enough to tilt the trailer. |
 |
 |
| I've
reversed the location of the strap and will pay out line
as I pry the shaper off the trailer. |
Off the
trailer and on to a large pipe to make the transition from
trailer to shop floor. |
Getting the
shaper up the small hill was uneventful. The winch wasn't even
getting warm. When we arrived at the base of the tilt trailer, it
took us a couple tries to make the transition from the OSB on the
grass to the steel ramp of the trailer. Once we got the front of
the sled on the trailer, Charles made the suggestion to tie off
the top of the shaper so that there would be little chance of it
tipping. I hadn't considered that possibility, but he was thinking
safety and I was all for it. Another couple pulls from the winch
and we had the shaper almost far enough on to the trailer to cross
the balance point and level out the tilt trailer. The shaper was a
bit too far to the right side of the trailer, so we spent the next
half hour or so getting it centered before we pulled it over the
pivot point.
With the shaper
centered on the trailer, we cinched it down with chains and chain
binders and a couple of heavy straps for good measure. The shaper
got a tarp over it and it was time to put the tools back into the
truck.
The last item to
be attended to was hooking up the trailer to the truck. Charles
had the great idea to use the tow strap to pivot the trailer so
that we would be facing down the driveway rather than having to
back down the driveway on to the street. He was also concerned
that the trailer would bottom out and scrape on the steep
transition where the driveway met the street. (See the previous
gouges in the street and driveway above.) We were able to pivot
the trailer, but I am afraid that I put some pretty big divots in
the grass while doing so. We got the truck hooked back up to the
trailer and took a walk down to take a look at the intersection of
the driveway and street. There were some pretty deep scrape marks
where others had tried to negotiate this transition.
To help me get
past the incline, Charles grabbed a couple smaller pieces of
plywood and followed the trailer as I got ready to enter the
street. I think he shoved the plywood under the rear of the
trailer as we hit the steepest part of the incline to give the
trailer something to slide on, but I was too busy watching for
traffic and negotiating the driveway to see what he did. All I
know is that there was a slight scrape and I was now safely on to
the road. I stopped for long enough to thank him and we were on
our way home. The first part of the move was complete.
 |
 |
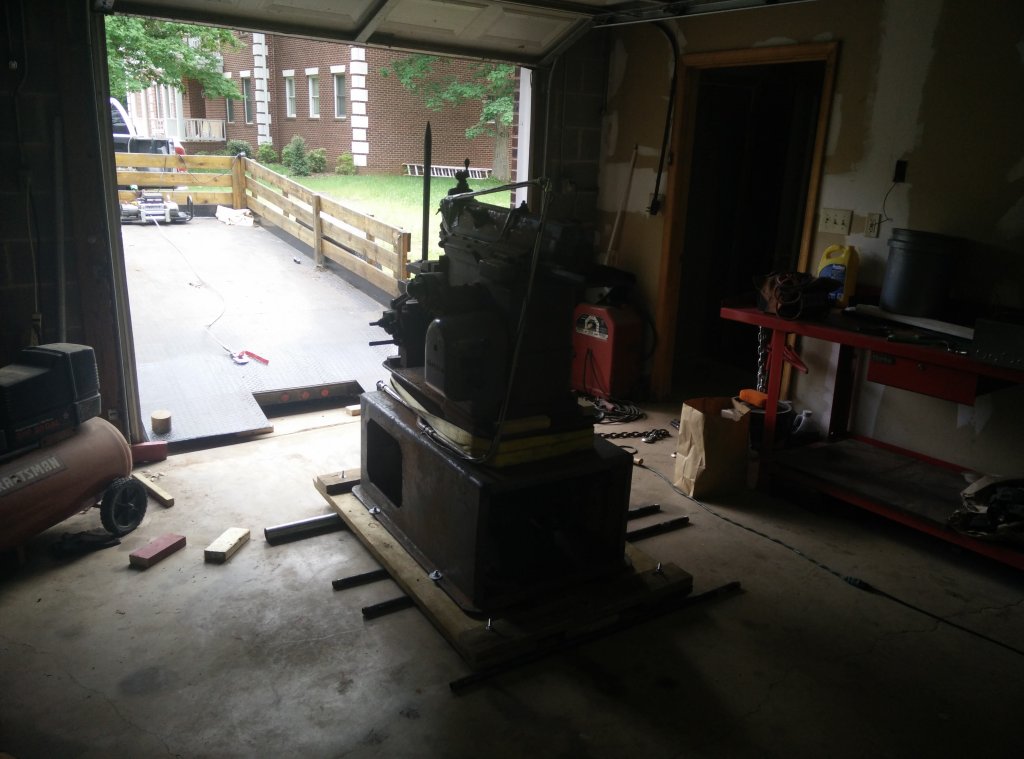
| The
shaper is now unhooked from the winch and is free to be
moved in the shop. |
The end
of a successful move. Time to do some clean up and figure
out where to put the shaper. |
The drive home
was uneventful. I stopped a couple times to make sure that the
chain binders were still good and tight. They were. When we
arrived home, I spent the evening putting away my tools and
putting a second tarp over the shaper. I would off-load it
tomorrow.
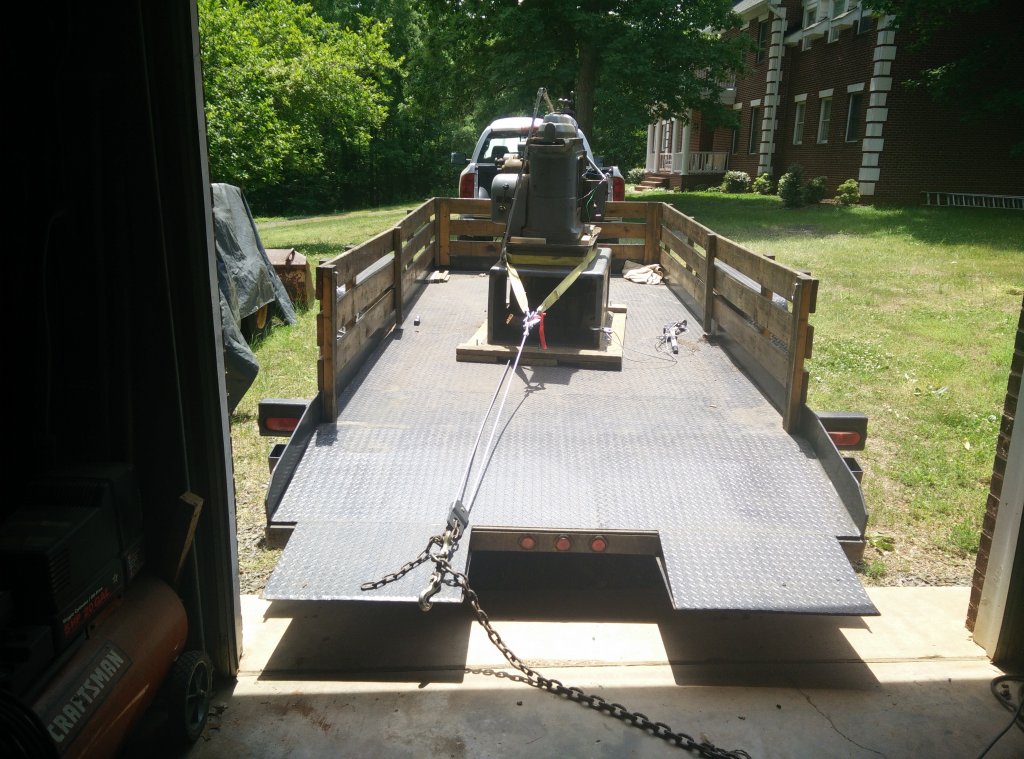
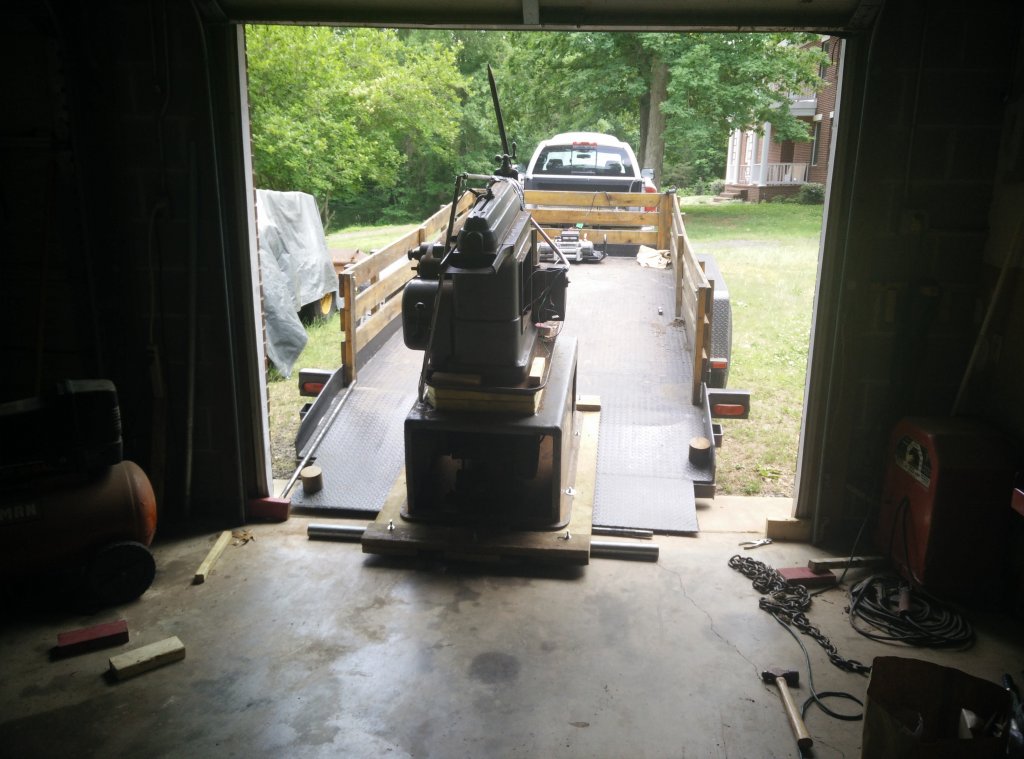
Getting the
shaper off the trailer was a lot easier than putting it on. I can
back up to my shop and the ramp of the trailer fits through the
garage door of the shop. I used a snatch block attached to the end
of the trailer to pull the shaper far enough to cause the trailer
to tilt, then reattached the cable to the high side of the shaper
to prevent it from sliding too quickly down the inclined ramp. I
used a Johnson bar to work the sled down the trailer and on to a
3" pipe to make the transition to the shop floor. Once it was on
the pipes, it rolled easily and I added the smaller pipes to get
it into the shop.
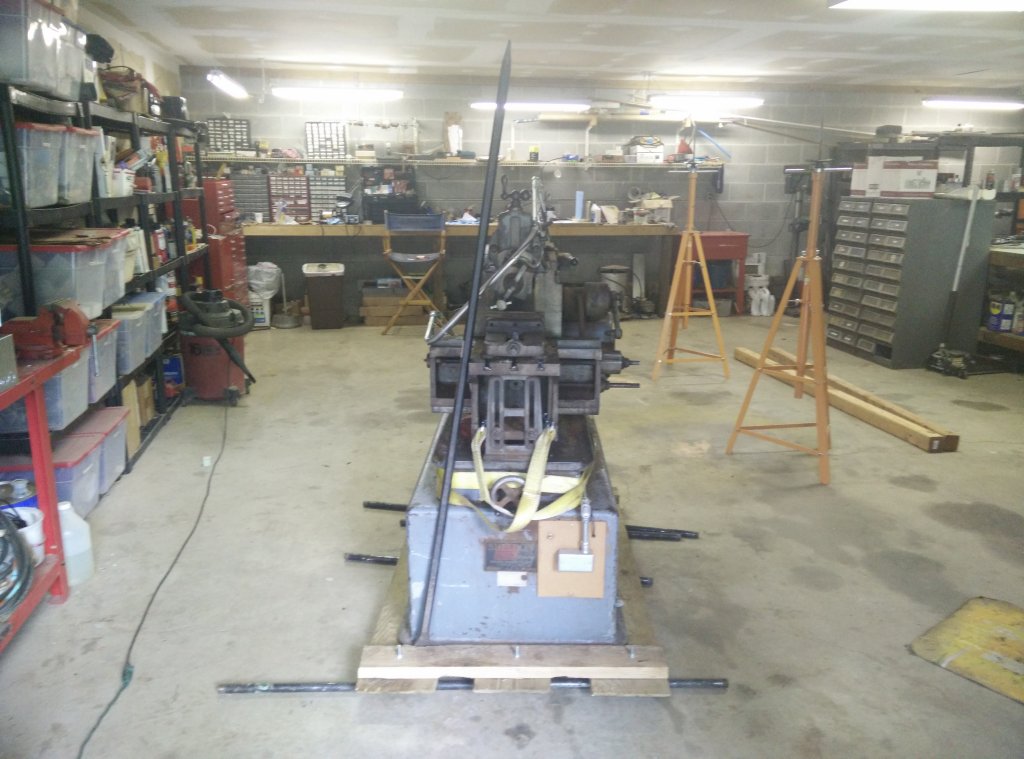
I now have a
shaper. I am looking forward to getting to know it and learning to
use it.
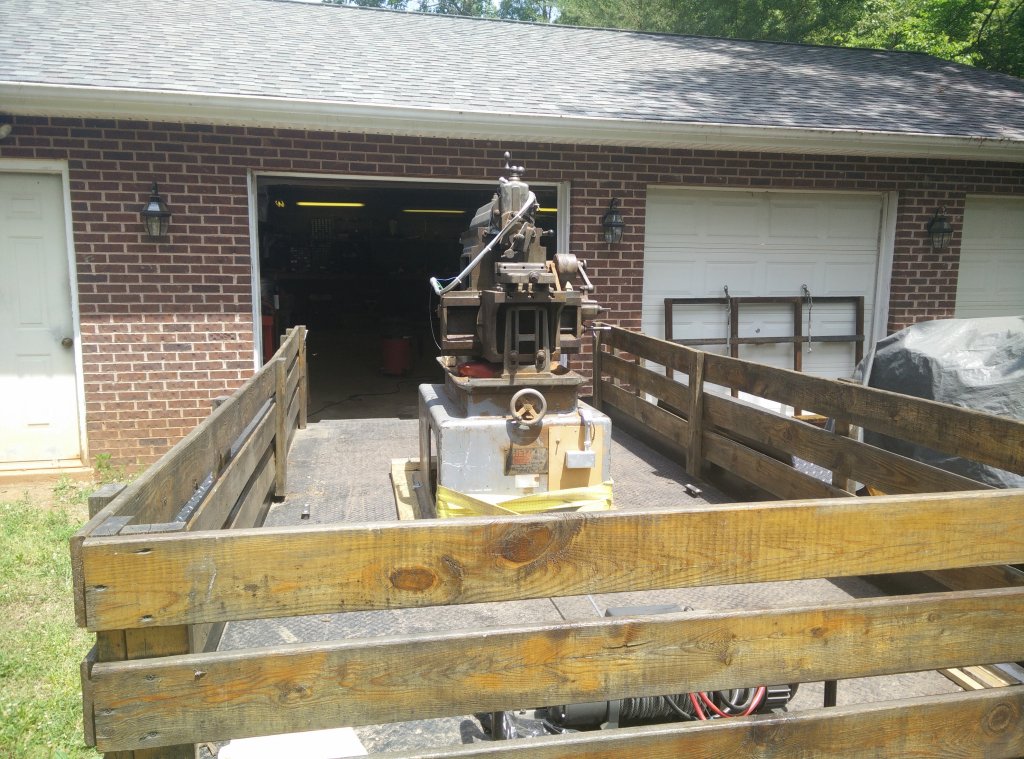
| Shaper |
Shaper
2 |
Shaper
3 |
Shaper
4 | Shaper
5 |
Shaper
6 |
Shaper
7 |
Shaper
8 | Shaper
9 |
© Fager May 31, 2015