Replacing a Dodge Ram Diesel Oil Pan
May 25, 2016
In early April, I
serviced both our vehicles. Typical fare, oil changes, coolant
changes, check the brakes, etc. I was finishing up on my truck
and again noticed that I had some rust bubbles on the corner of
the oil pan. I had seen them before and being inherently lazy, I
had not done anything to take care of them. However, this time I
thought should be proactive and clean the rust off and give the
pan a coat of paint. I should have done this sooner. I hit the
rust on the corner of the pan with a hand held wire brush. On
the first pass with the brush, I removed some rust flakes and
now had oil coming through the pan. Bummer. Of
course I had just changed the oil and had 12 quarts of new
15w-40 Shell Rotella oil in there and it was now peeing out on
to the shop floor. I scrambled to get something to stop the
leak. Some putty slowed it down enough that I could clean the
oil pan and get it underneath the leak. No, I wasn't going to
waste the new oil.
I drained the oil back
out and let the pan continue to drip from the oil drain hole and
went in for dinner. When I returned, the oil had stopped
draining from the oil drain hole, but the corner of the pan was
still dripping. After some looking on the internet, I found a
picture that showed the inside of the pan. I now realized what
was going on. There is a raised area around the oil pan plug
hole. The raised area is higher around the drain hole than the
bottom of the oil sump. There was no way to get all of the oil
out of the bottom of the pan by draining out of the oil plug
hole. Note that this is also the case with my new replacement
Spectra Premium oil pan. On the Spectra, the welded-in ring for
the drain plug threads captures a little more oil than the
original equipment manufacturer (OEM) pan does. Not the best
design in my view as you're left with about a half quart of old
oil that you can't drain out.
With the oil now mostly drained, I decided to use a dental pick
and see how much of the rusted area was weakened. I ended up
poking the pick through the pan and creating an eighth inch hole
before I met with un-rusted steel. I sanded the rusted corner
until I had clean steel. I don't know if the black coating is
paint or powder coat, but on my pan, there was also a clear coat
of some type over the top of the black that was peeling off in
sheets. Unfortunately, I really let this situation go on for too
long.
|
|
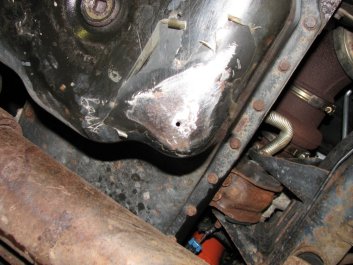
After
causing the leak, I sanded the pan. I poked a dental
pick through the small hole and made the small hole
into a bigger one.
|
The
clear coating is coming off the oil pan in sheets.
Apparently moisture has gotten beneath the clear
coating and has lifted it off the pan.
|
Once I had the corner
of the pan cleaned up, I jacked the truck up on one side so that
the hole I had made was the lowest point on the oil pan and left
it to drain over night. The next morning, the drips had slowed
down, but not stopped all of the way. Since I would be
attempting to epoxy up the hole to buy me some time, I wanted as
clean and dry of a surface as possible for the epoxy to bond to.
I decided to jack up the other side of the truck so that my hole
was now not the lowest point on the oil pan. This stopped the
oil flow.
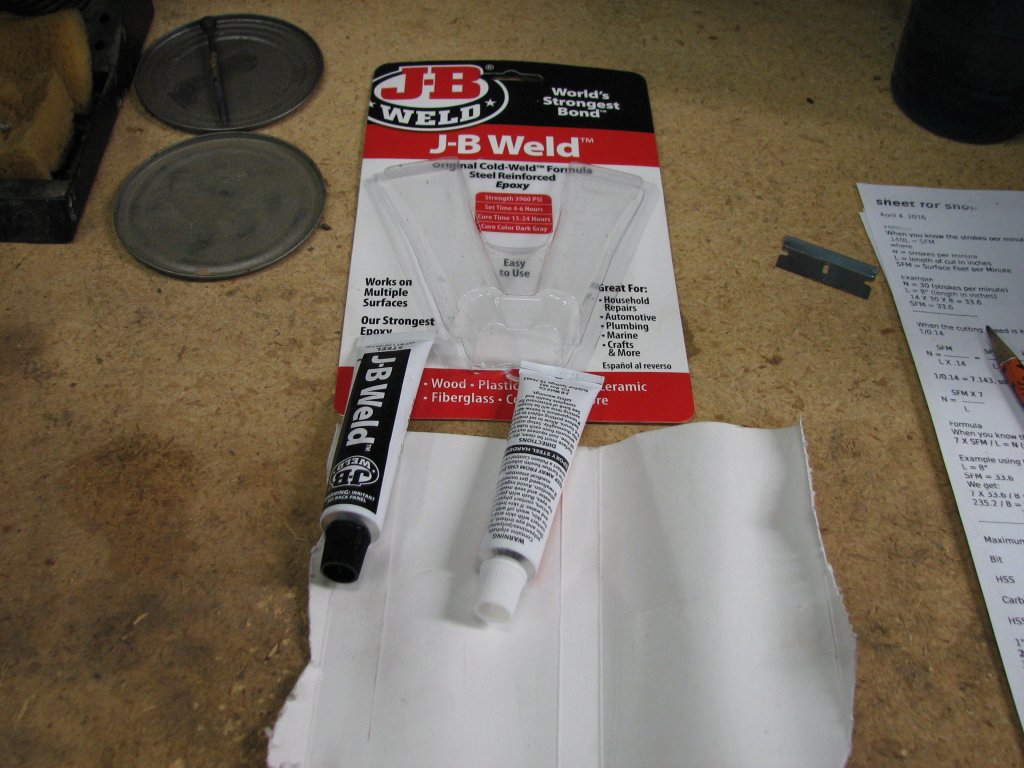
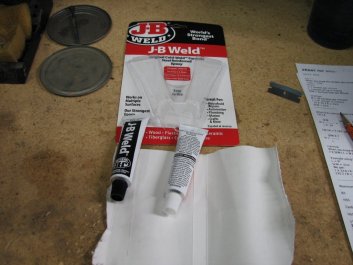
I again sanded the pan
with an orbital sander, then cleaned the oil pan with brake
cleaner, then lacquer thinner. I mixed up a batch of J-B Weld,
the slow setting type, and slathered on a layer. After about a
half hour later in 70° temperatures, I added a small square of
sheet metal over the hole and some more J-B Weld. This square
patch piece didn't work as well as I would have liked. After
curing for 24 hours, the square of metal had dropped away from
the pan by about a 1/16" or so. It still gave some support, but
not as much as I had hoped for. In hind sight, I think a better
procedure would be a coat of J-B Weld, then a piece of cotton
cloth or some window screen, then another coat of epoxy. My aim
was to get a little more thickness and some reinforcement around
the area of the hole.
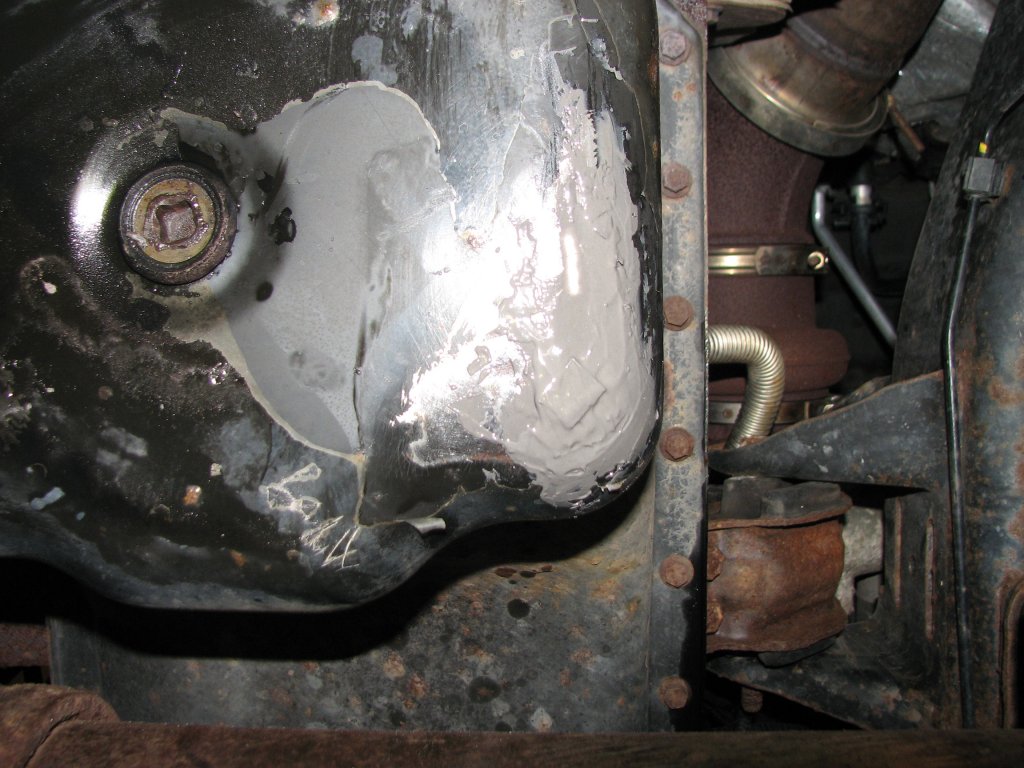
Five weeks later and with the oil pan now replaced, the J-B Weld
is still quite solid. How long I could have gone with the epoxy
repair is debatable, but I don't think I would trust it as a
permanent repair.
|

|
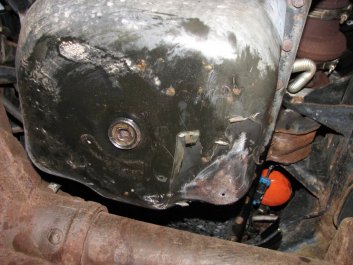
While
it's not a permanent fix, The J-B Weld bought me
over a month of time.
|
A coat
of J-B Weld, then let it set up, then add a square
of sheet metal and another coat of epoxy.
|
I
did some reading about oil pans and their cost. I could have
gotten one from the dealer, but the cost was almost twice as
much as I ended up spending. You could contact Cummins
directly and get an OEM pan for a little less than the
dealer. There's also a company that sells stainless steel
oil pans. The stainless pans are pretty neat looking, but
they're not inexpensive. As cost is always a consideration
for me, I thought that as long as I kept up on the
maintenance of a painted steel oil pan, I wouldn't have the
issue again.
I finally
decided on a Spectra
Premium CRP45A oil pan and a Fel-Pro
gasket from Amazon for about $287
including tax and no charge for shipping. After the parts
arrived, I made sure that the new pan looked like the old one.
It did. Since the new gasket was folded and wrapped around
some tubes so it would fit in a smaller box, I needed to
flatten it back out by sandwiching it between a weighted board
and my work bench. The gasket is not coated with any sealant,
so I decided to use some RTV sealant on both sides of the
gasket. When I was about an hour from installing the new pan
and gasket, I applied a thin coating of RTV to the pan and
added the gasket. Hopefully this would keep it from slipping
out of position when I installed the pan.

|
|
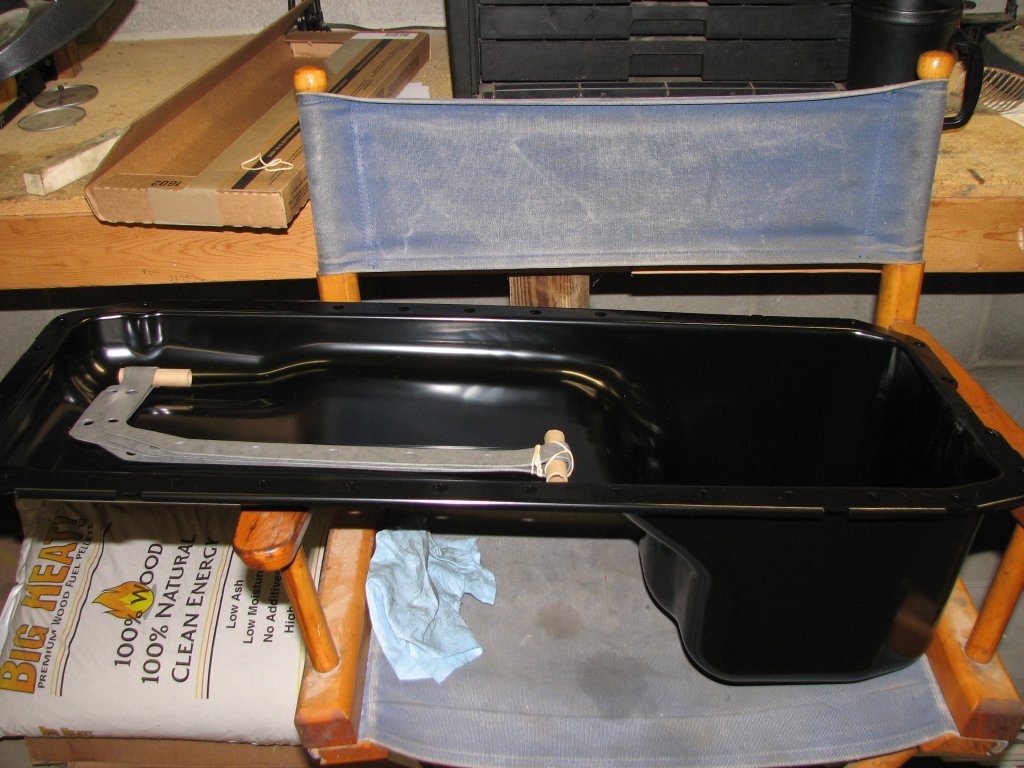
The
new Spectra pan and the Fel-Pro gasket. I
needed to flatten out the gasket before use.
|
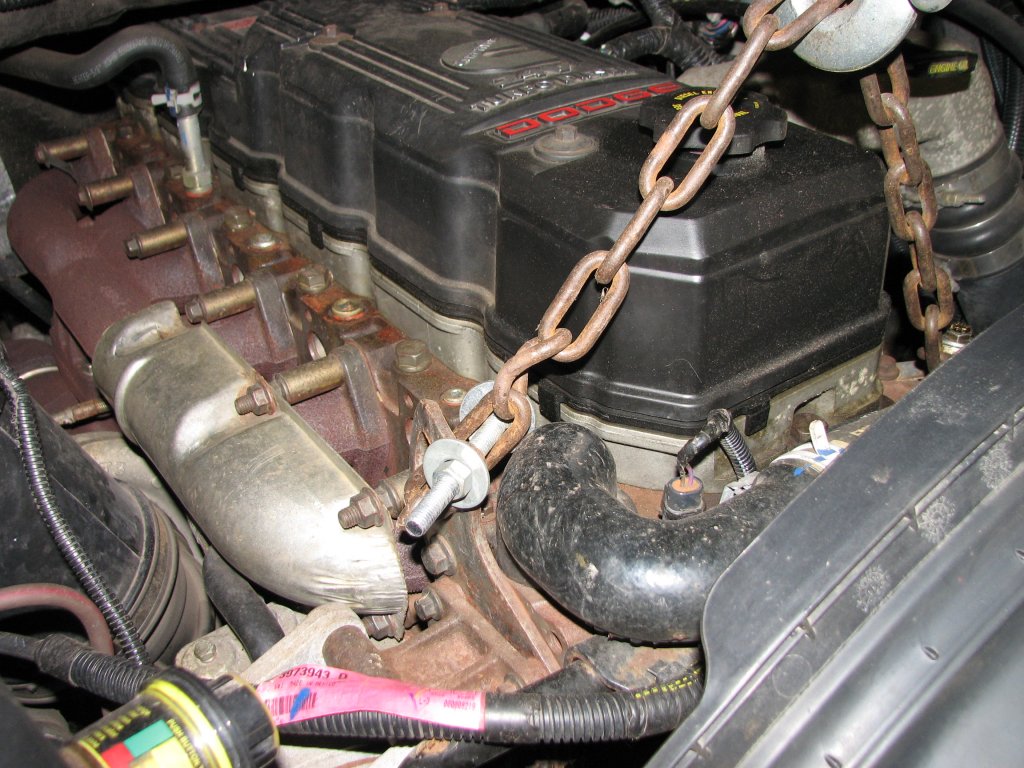
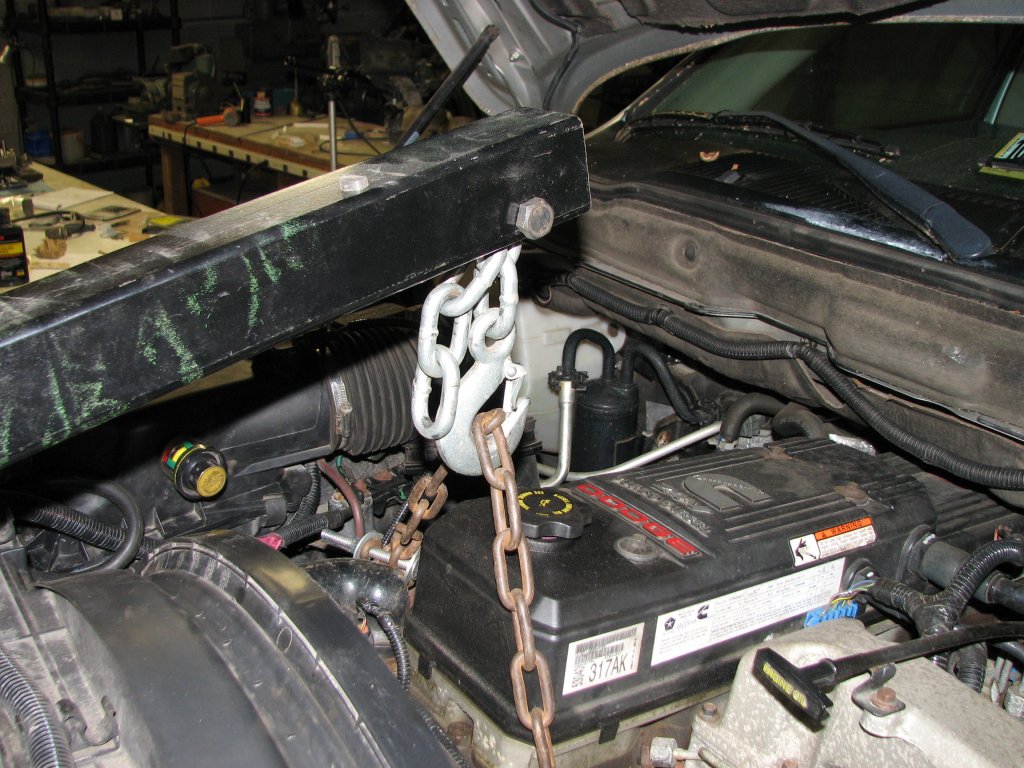
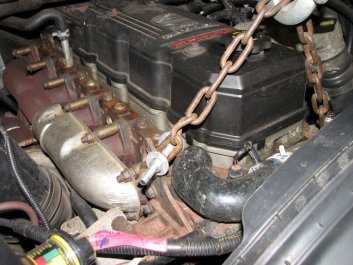
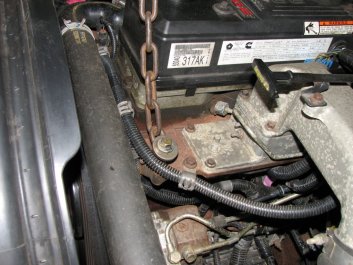
Passenger
side lift mount. The chain is passed through the
lift eye and secured with a bolt.
|
My
2006 Dodge Ram workshop manual suggests that removing the
transmission is necessary for replacing the oil pan.
However, being a former dealership mechanic, I very much
doubt that the dealer mechanics follow the book on this. I
am pretty sure that to beat the flat rate time for this job,
they do it similarly to what I and others have done. From
having just done this job, I see no down-side to not
removing the transmission.
A vehicle lift would have made this job a whole lot easier,
but since I was working on my back on a creeper, here's what
I did.
- Drain the
engine oil.
- Jack the truck
up, remove the front wheels and place jack stands to
support the frame behind the front suspension mounts.
Block the rear tires for safety.
- Removing the front wheels gives you some extra working
room and unloads the front suspension. This gives a little
more clearance room between the oil pan and the
suspension.
- Loosen both front motor mounts horizontal "through
bolts" and nuts - 18mm head - these bolts need to have
some space on either side of the slotted flanges that they
attach to to make it easier to get them back into place.
- Attach one side of a short chain to the passenger side
motor lifting eye.
- Attach the other end of the chain to a 3/8"-16 tpi bolt
screwed into the outer unused hole on the front of the
intake manifold.
- Attach the chain to the hook on your engine hoist. I'm
using the 1 ton position on my 2 ton Harbor Freight (HF)
engine hoist. This position put the hoist forward enough
that it wouldn't interfere with my creeper.
- Lift the engine about 4". You can judge this by watching
the clearance on the top of the radiator fan shroud where
it meets the radiator or by watching when the back edge of
the valve cover just about touches the firewall.
- Remove the 32 oil pan bolts. These are special 8mm X
1.25 mm pitch (I think that's the pitch) with a 10mm hex
on flanged heads.
- Use a putty
knife to separate the pan from the block. I thought it
best to try and get the putty knife on the side of the
gasket closest to the engine block to lessen scraping
off the old gasket material from the engine block.
- Drop the pan straight down, then slide it toward the
rear of the truck to get it out. It's a close fit to get
it past the oil pickup tube on the driver's side of the
engine block.
- Clean the old gasket material from the bottom of the
block.
- Replace the old pan with the new one.
|

|
Driver's
side mounting point. A 3/8"-16 bolt with a heavy
washer attached to the intake manifold.
|
The
chain is attached to the engine hoist and we're
ready to lift the engine.
|
A couple notes:
The horizontal motor mount bolts and nuts have 18mm heads and
there wasn't a lot of room to get anything other than wrenches
in there. I tried a couple different 18 mm sockets with breaker
bars and socket wrenches with no luck. The nuts on my motor
mounts were also darned tight. I used cheater pipes on the
wrenches to break the nuts free. I could only turn the nuts one
flat at a time, so it took a while to back the nuts off.
The mount holders on
the frame are slotted on the top side. This makes it a lot
easier to lift the engine, but to set it back in place, you need
bolt space on either side of the mount holders. I backed each of
the two nuts off by 1/2", then used a hammer and brass drift to
center the bolt so that I had space on either end. This was the
toughest part of the job. My bolts were pretty corroded into the
mounts and didn't want to move. I used plenty of penetrating oil
and a 5 pound hammer on a brass drift to center the bolts.
Eventually I had some space on either side of the mount flanges.
One correction (for my
truck) to the accounts I have read online about the radiator fan
shroud. I read that you needed to remove the bolts that hold the
radiator fan shroud in place. I found that this wasn't
necessary. On my truck (2006 2500 CTD), the fan shroud slips
past the radiator with the bolts in place.
Here's a tip that I
think will help some folks in the snowy regions. About a week
before I started the job, I loosened, then re-tightened the 32 -
10 mm head pan bolts to make sure that none of the bolts were
frozen in place. A friend who lives in a much snowier climate
has also done this job on his 2008 3500 diesel. He broke a half
dozen stuck pan bolts trying to get them out. These are special
flanged bolts that are not available at the hardware store or
other likely sources, so I thought it better to be prepared and
test them first. If I would have encountered stuck pan bolts, I
would have purchased some from the dealer ($3 each) to have a
few extra in case I broke one or more. As a precaution, I also
got a couple left hand drill bits in case I had to drill out any
broken bolts. The reason for the left hand drill bits is that
they sometimes catch while drilling out the broken bolt and spin
out the remainder of the bolt. This does away with the need for
using an "easy-out" type stud remover. I got 1/8" and a 3/16"
left hand drill bits to be on the safe side. I didn't need to
use them, but I have them for the next job.

|
|
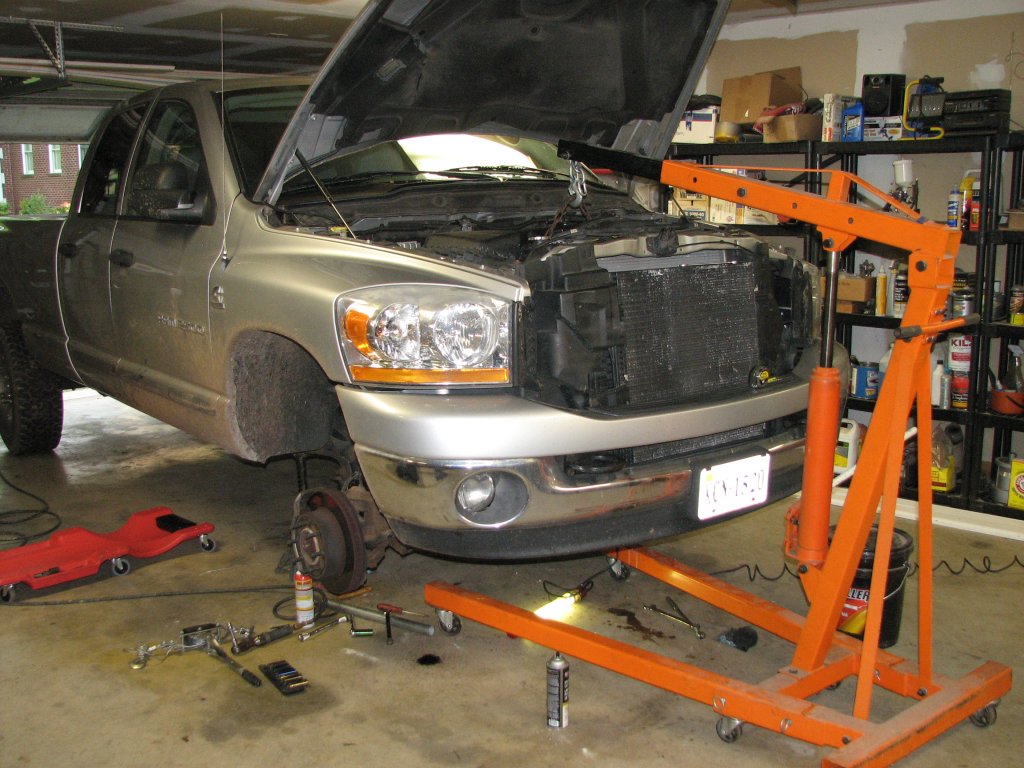
The two
ton HF shop crane set on the one ton position. We're
ready to lift the engine.
|
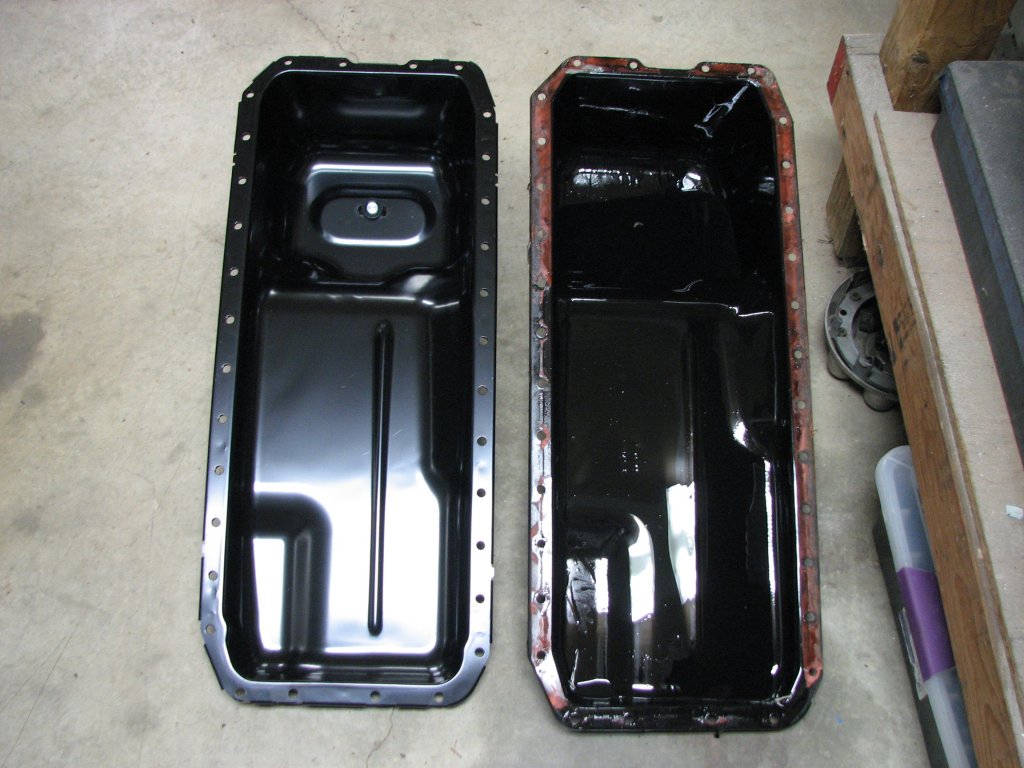
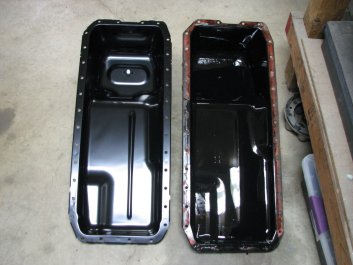
New pan
on left. Old one on right. The Spectra pan was a
perfect fit.
|
As one would expect in
doing this job, you will get covered in drips of oil when you
remove the oil pan and are laying under the open engine
block. I laid down an old plastic shower curtain on the shop
floor under the pan before I removed it. It caught the majority
of drips and I only had a few spots of oil to clean up off the
floor after I did the job. The old shower curtain was covered in
oil and was discarded. Unfortunately, I got pretty oily too.
The longest part of the job was scraping off the gasket material
from the engine block. As you can see from the picture above
right, fortunately most of the gasket came off with the pan. To
get the rest of the gasket off the block, I used a freshly
sharpened gasket scraper and a few single edge razor blades. You
need to pay particular attention to the ends where the cast iron
block meets the aluminum castings.
My factory workshop manual cautions against using sealant on the
gasket, but I think that the reason for this is that the stock
gasket has a sealant included on top the gasket when it's made.
The Fel-Pro gasket doesn't have any added sealant and in an
somewhat oily application, I'd think that it would benefit from
some additional insurance. In any event, I have done many pan
gaskets over the years and never had a problem using a thin
coating of RTV sealant on both sides of the oil pan gasket.
With the bottom of the block scraped as clean as I could get it,
I sprayed the entire mating surface with brake cleaner. Lately,
I've been using the Traveler (house brand) brake cleaner from
Tractor Supply. It seems to clean better and dry more quickly
than the CRC brand Brakleen brake spray I had been using in the
recent past. It doesn't work as well as the stuff I was using in
the 1980s, but it's probably not as bad for your health either.
|
|
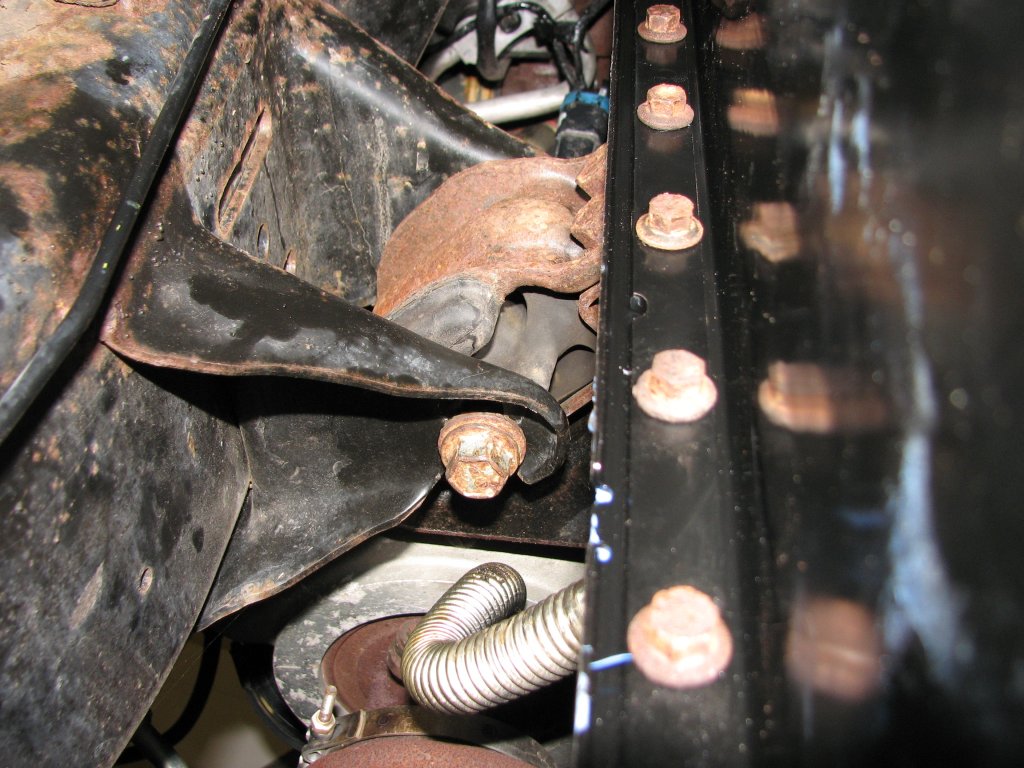
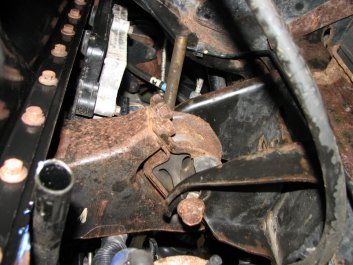
Looking
up from underneath. Passenger's side motor mount with
the bolt backed off. With the engine lifted, the bolt
is out of the slot.
|
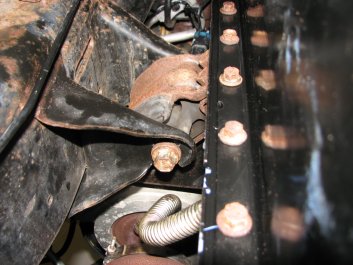
Driver's
side mount. You can also see the extra flat metal in
the pan flange under the pan bolts. The pictures were
taken after I installed the pan.
|
I added a thin layer of RTV to
the top of the gasket which was now stuck firmly to the oil pan. I
let this set up for about a half hour before I attempted to
reinstall the pan. It is a bit of a tight fit to install the pan
between the cross member and the oil pickup tube. I found that I
needed to have the oil pan parallel to the bottom of the block and
then slide it past the frame cross-member, which is the closest
point to the bottom of the engine block. With the pan now
more-or-less in position, I replaced the cleaned pan bolts on all
4 corners of the pan and gently screwed them in until the pan
touched the block. I then added the other 28 bolts. I tightened
the two center bolts - one on either side of the center of the pan
to 10 foot pounds, then tightened the bolts in a circular
pattern. The last bolts to be tightened were at either end
of the oil pan. This helps to apply torque to the pan evenly. When
all 32 had been tightened to 10 foot pounds, I tightened the two
bolts I had started with to 21 foot pounds (Dodge's torque spec.)
and repeated the pattern to tighten the rest of the bolts.
The job took pretty much a full day to complete. I took my time
but ended up spending more time than I thought I'd have to in
order to get the motor mount bolts loosened. However, the job is
done and I have no oil leaks. I will recheck the pan bolt torque
in a week or so and also recheck it the next time I change the oil
on the truck. All in all, it wasn't a bad job. While I don't like
working on my back on a creeper, this job was pretty straight
forward.
I am pretty pleased with the Spectra oil pan. Unlike the OEM pan,
it has extra welded 1/8" thick flat stock on the bottom of the pan
flange to help even out the torque of the pan bolts. While the old
oil pan didn't leak from the flange, the added metal is a nice
feature. The pan was a little twisted when I got it. The pan's
flange wasn't quite as flat as it could have been. However, it was
only out of flat by an eighth inch or so and it cinched down tight
against the block. The one thing that I didn't like was that the
oil pan appears to be only painted with no clear coating over the
pan. It may be a little more prone to chipping and rusting than
the old pan that lasted almost 10 years. However, since I now that
I know that oil pan rusting is a problem with this truck, I will
check, clean, and repaint any areas that have been hit by stones
at each oil change. We are at the end of a gravel road and have a
gravel driveway, so I'm sure I will be doing some painting on the
pan every oil change. Better to do a little clean up, than go
through a rusted out oil pan again.
I spent a couple decades in automotive repair and this is the
first time I have seen a rusted out oil pan. If I would have known
this to be a problem, I would have been checking, cleaning, and
repainting the pan at every oil change. Oh well, you live and
learn.
© Fager May 25, 2016